Add a UI to our Game and Export the Project

This is Part 6 of the Godot series. Read Previous Parts here.
All the code is here, under Part 6
In this post, we will prety-fy our game a little– add game start and over screens, add a heads up display to show how many coins we have etc.
Let's start
Add a HUD (Head Up Display)
A Hud is a window that remains in a fixed position on the screen, and can be used to show such things as the number of lives, coins etc.
A CanvasLayer can be used for drawing to the screen; it will be separate from the game logic, so it won't be affected when you move the player etc.
Add a CanvasLayer, rename it to hud, and add a child Panel:
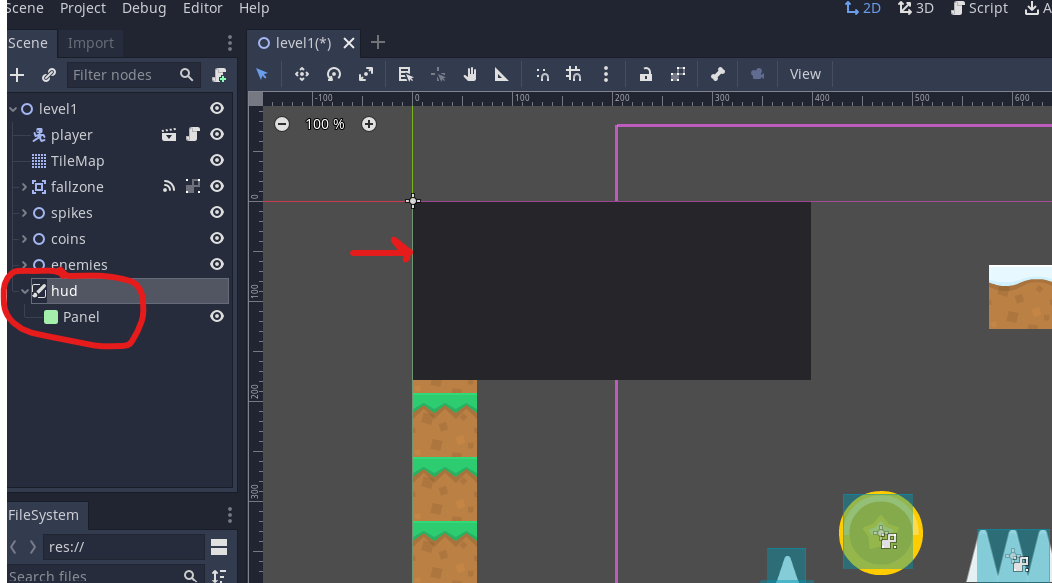
As you can see, the Panel is black and overwriting our screen. We want to make it see thru, so it doesn't interferere with the game.
With Panel selected, choose New Style box on the right and choose Flat:
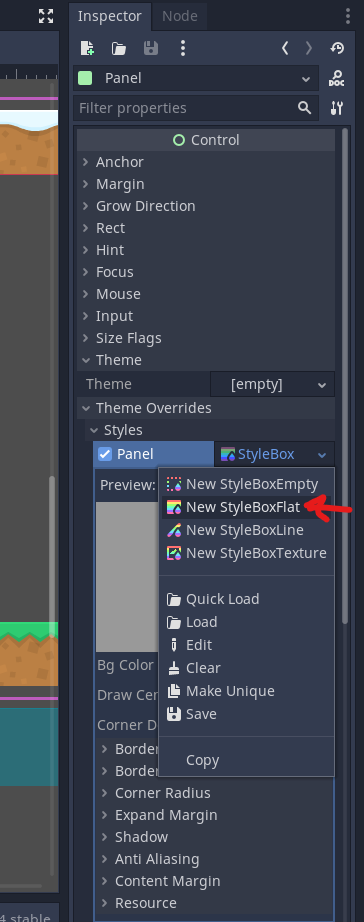
Why flat? As we dont need a special texture file for it (https://docs.godotengine.org/en/stable/classes/class_styleboxflat.html#class-styleboxflat)
Click on the new stylebox you just created and select BG color:
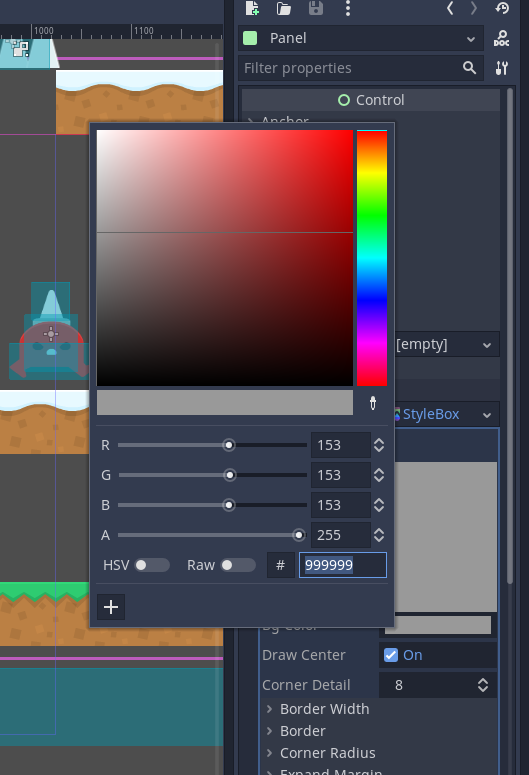
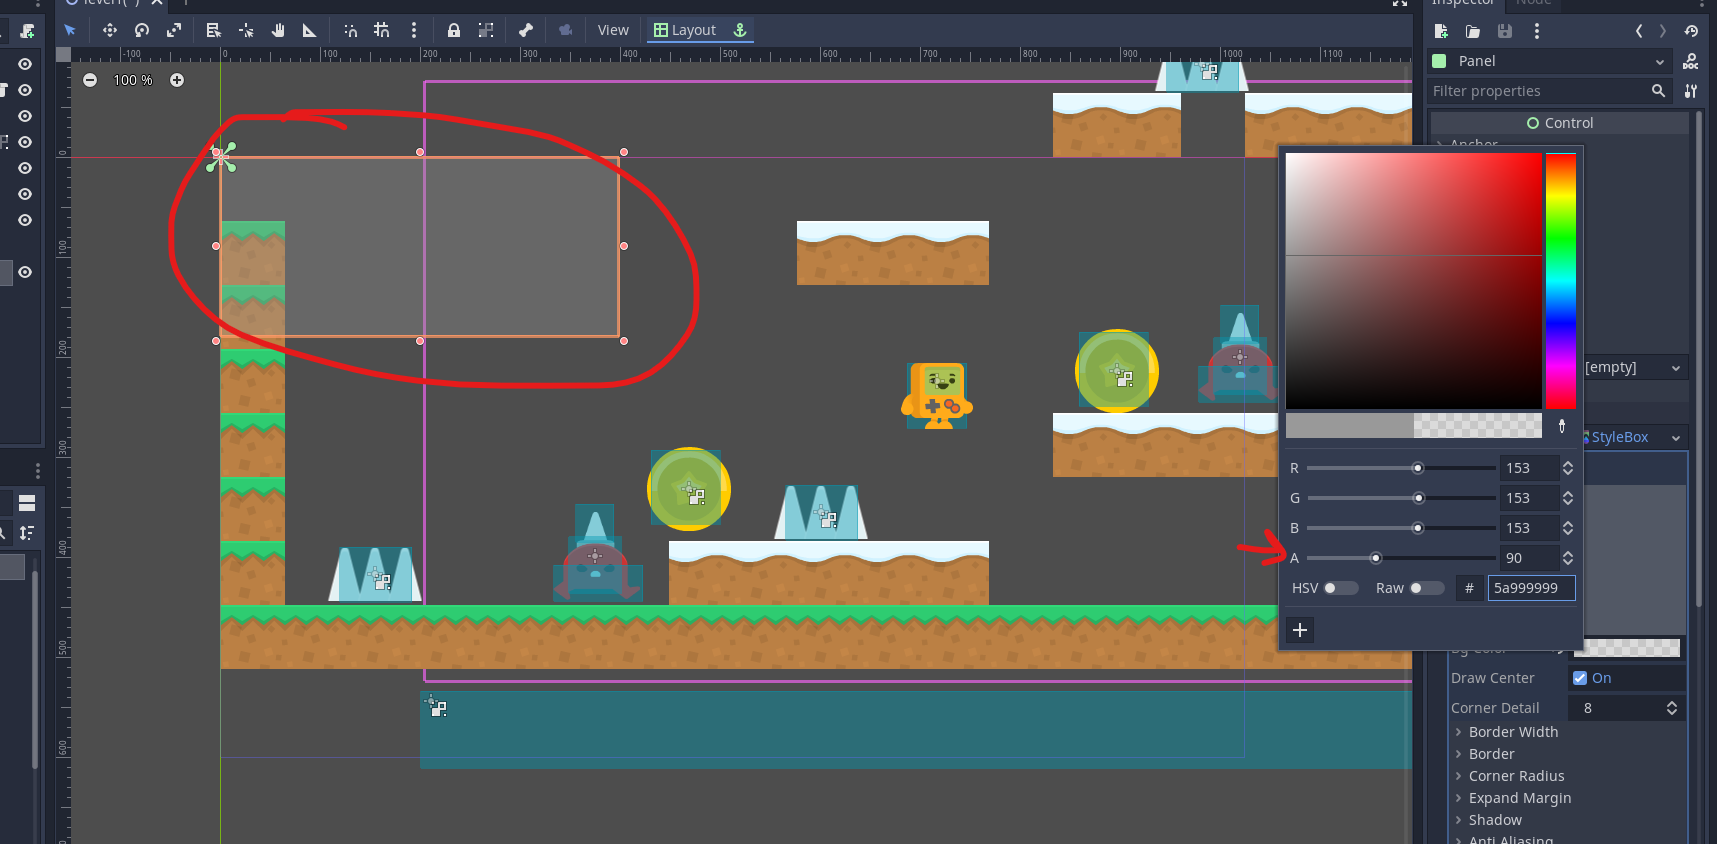
The only thing we want to change is the 'A' field, which stands for Alpha. Reduce it till our box becomes see thru:
Back to our hud: add 2 Label nodes. For the 1st one, add the text Coins Found, and click "Uppercase" option below it
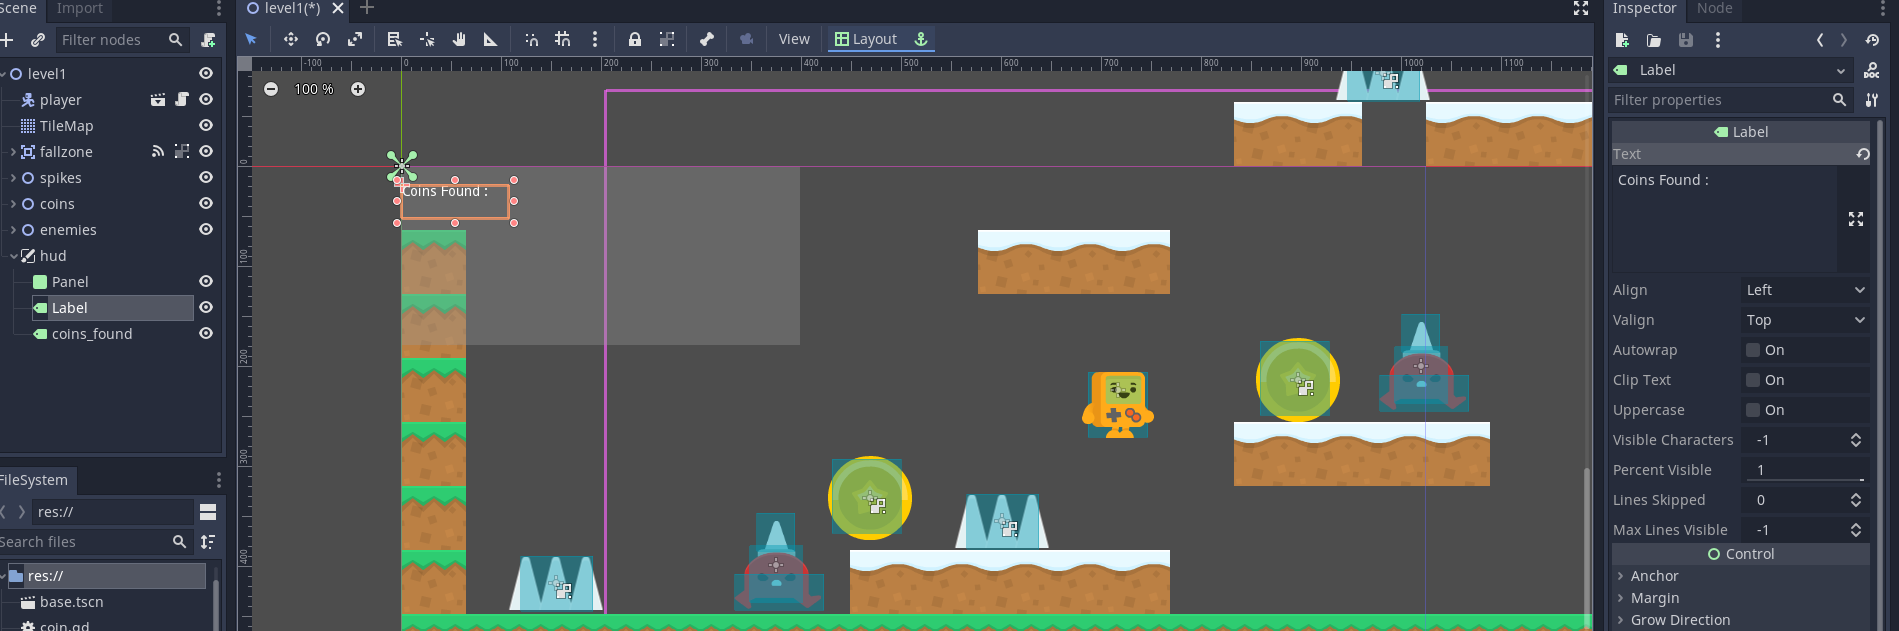
Try the game, move the coins found box if you want:

You will note it remains at the same place on the screen.
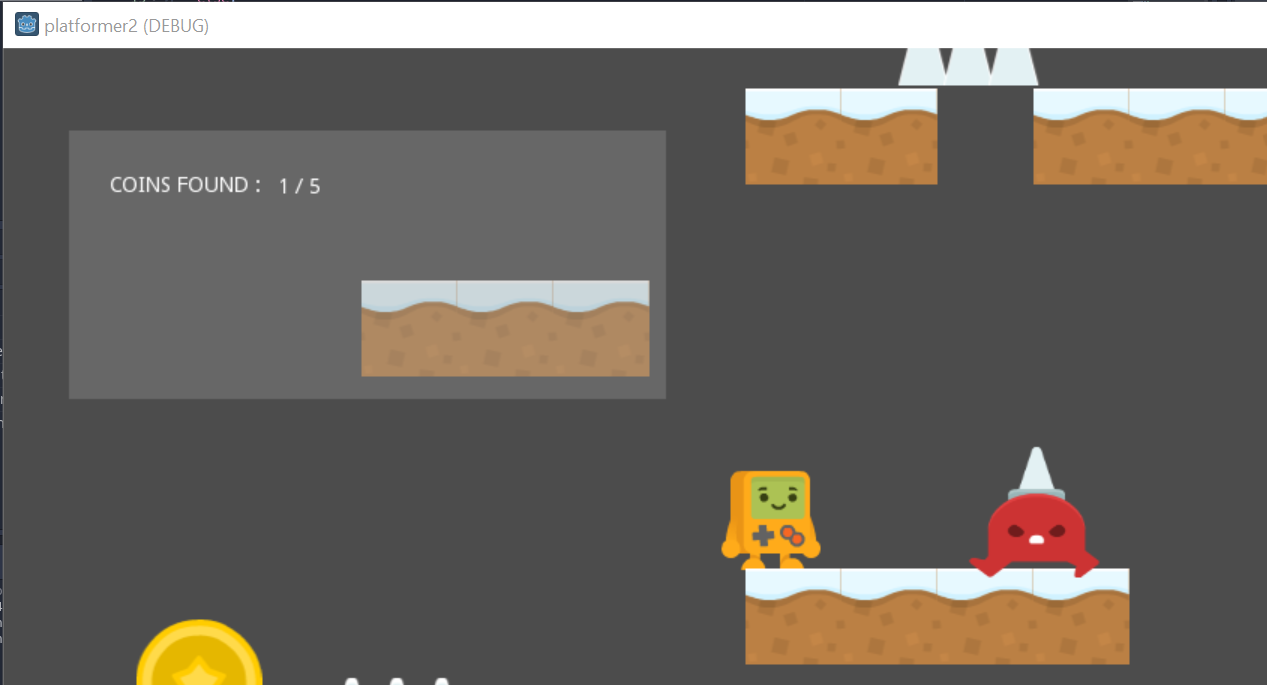
Let's add the coin data now. There are multiple ways to do it, the most ideal is to use signals; I will use the lazy approach and directly change the text on the coins_found label. Update the code:
func _on_coin_body_entered(_body):
	coins_found += 1
	print("coins found =", coins_found)
	get_parent().get_node("hud/coins_found").text = str(coins_found) + " / " + str(TOTAL_COINS)
We get the node "hud/coins_found", and update its text to show the coins found / total coins.
Give the game a play.
Great. Let's add a game start and game over scene.
Adding player lives
Let's give the player 3 lives, after which the game ends.
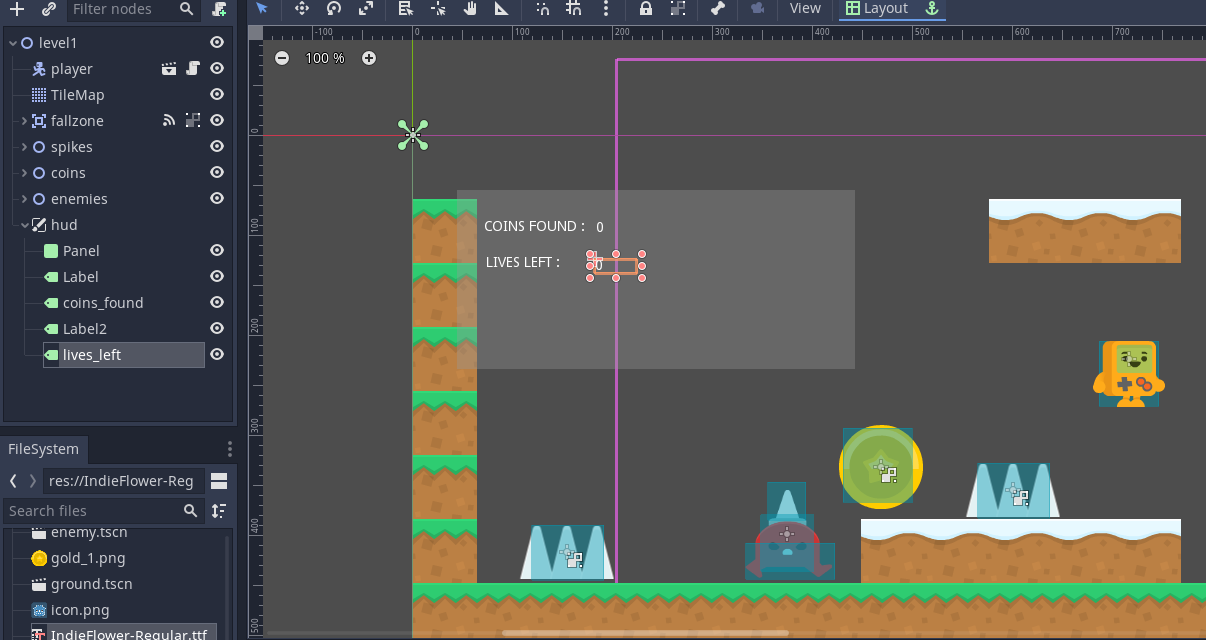
Copy the coins found hud code and add lives left:
Create a new function die(), to be called everywhere we were manually changing the scene to level 1 (like when we touched the spikes and died):
func die():
	# warning-ignore:return_value_discarded
	get_tree().change_scene("res://level1.tscn")

func _on_fallzone_body_entered(_body):
	print("fallzone entered")
	die()


func _on_spikes_body_entered(_body):
# warning-ignore:return_value_discarded
	print("spikes entered")
	die()
Now we need to update the lives left variable.
We could just create a new variable, with:
var lives_left = 3but the problem with that is: Every time the level reloads, like when the player dies, lives_left will be reset to 3. Try it and see for yourself.
We need a way to remember the lives left variable between games. The way to do that in Godot is to use the Singleton pattern https://docs.godotengine.org/en/stable/getting_started/step_by_step/singletons_autoload.html
Using the Autoload (singleton) pattern to remember player state
In the scripts window (File->New Script), create a new script called global.gd:
extends Node

var  player_lives = 3
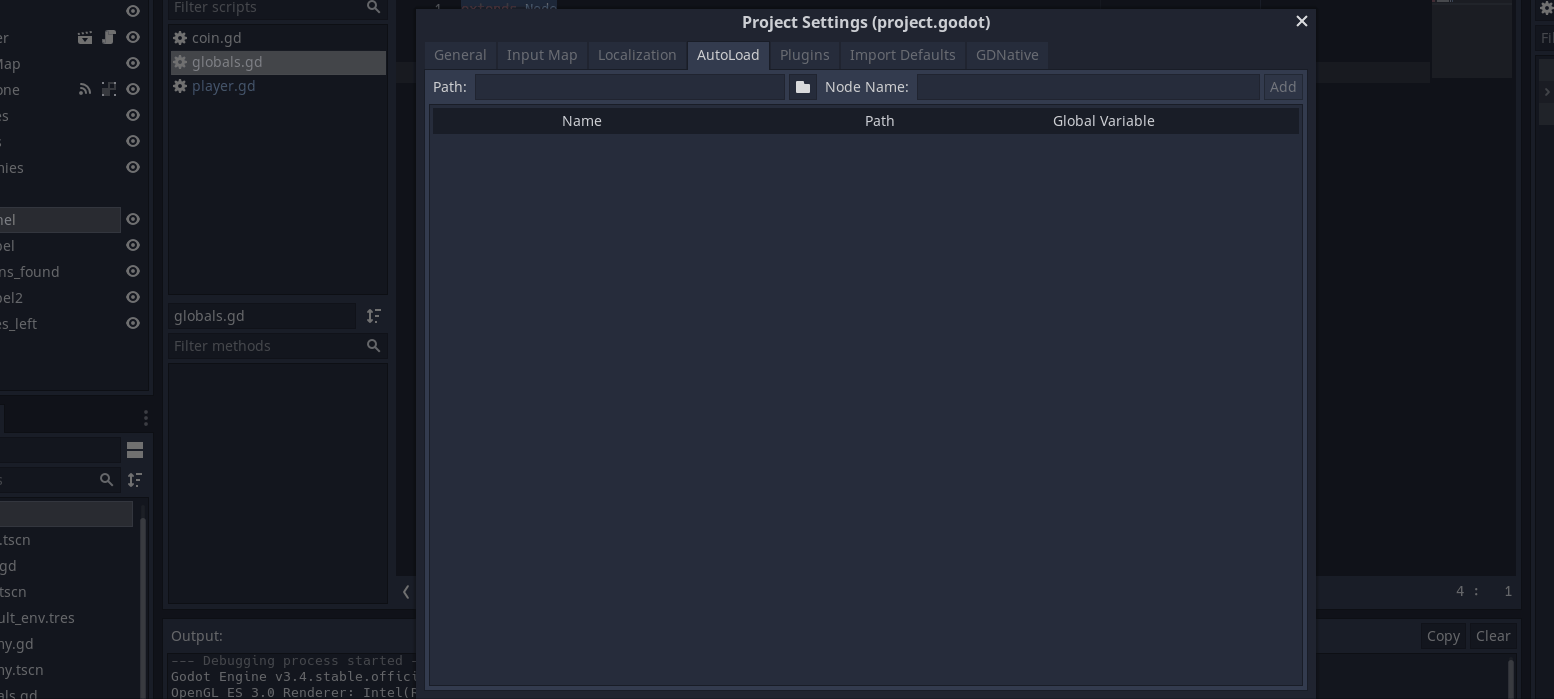
Now go to Project- > Project Settings -> Autoload, and add our script:
Update the _ready and die function:
func _ready():
	coins_found = 0
	TOTAL_COINS=get_parent().get_node("coins").get_child_count()
	get_parent().get_node("hud/coins_found").text = str(coins_found) + " / " + str(TOTAL_COINS)
	get_parent().get_node("hud/lives_left").text = str(Globals.player_lives)

func die():
	Globals.player_lives -= 1
	if Globals.player_lives > 0:
		# warning-ignore:return_value_discarded
		get_parent().get_node("hud/lives_left").text = str(Globals.player_lives)
		get_tree().change_scene("res://level1.tscn")
	else:
		print("You died!")
		# Go to End SCreen
We don't have the end screen (when the player loses all lives), we need to create one.
Creating the Start and End Screens
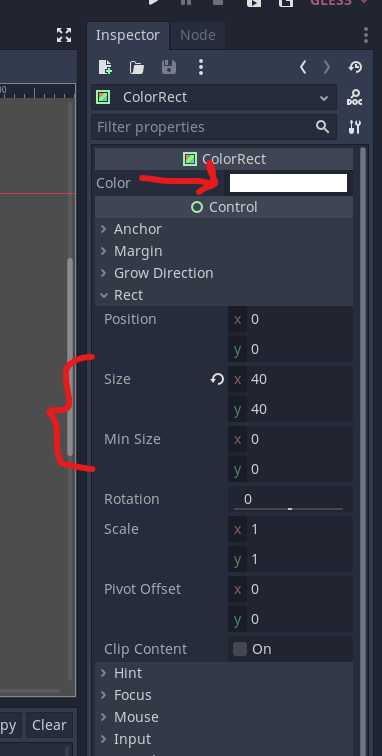
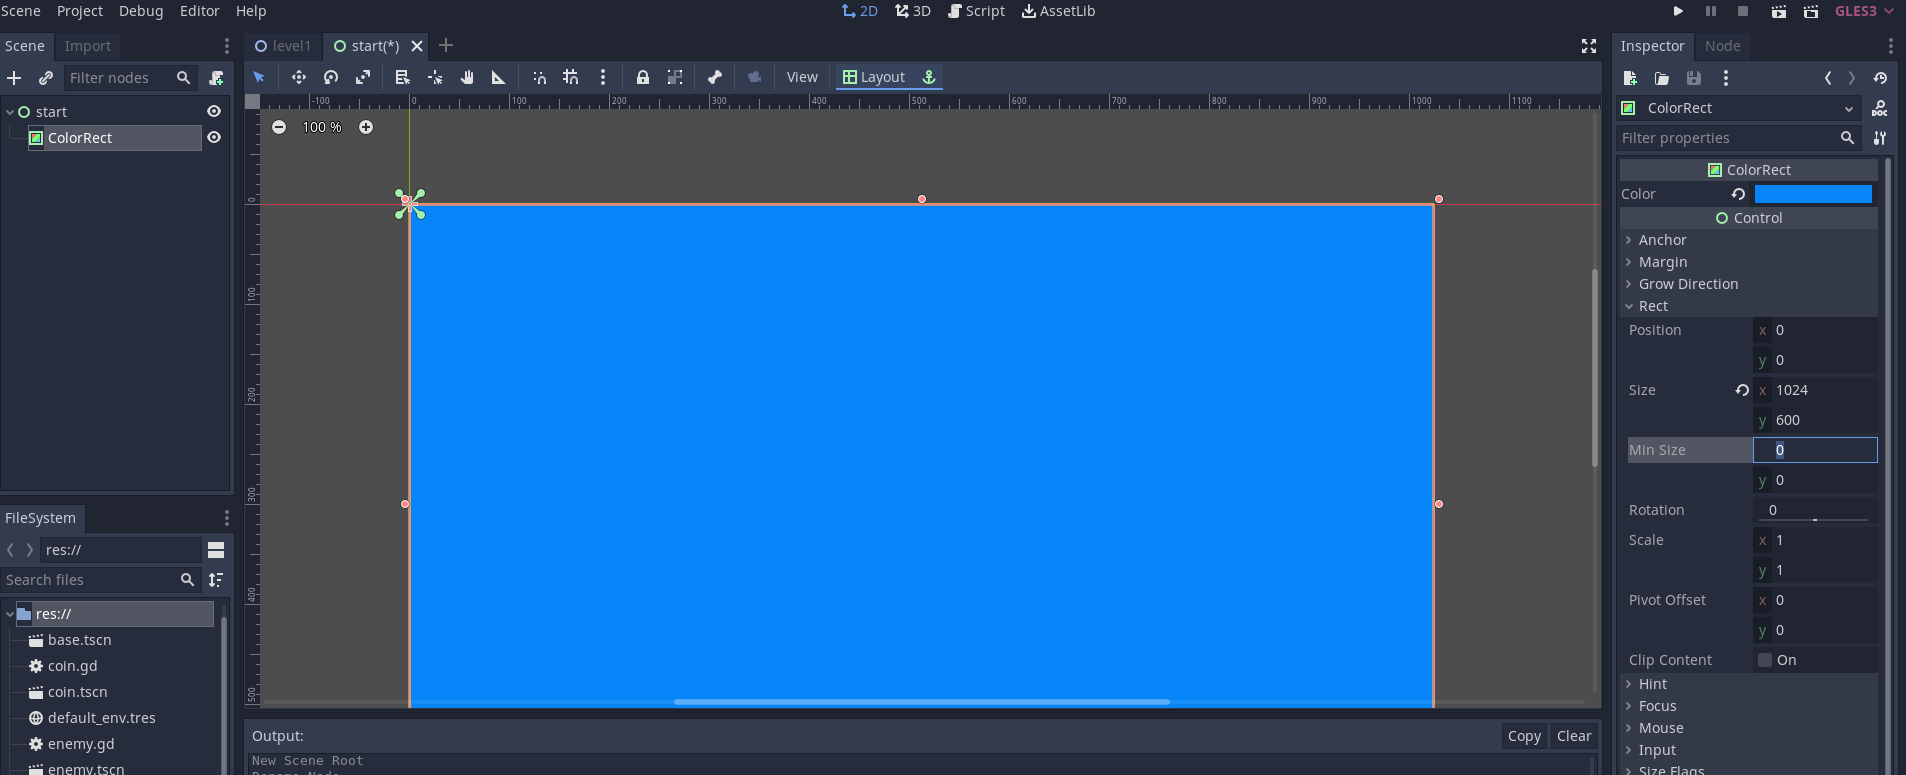
Create a new scene of type "User Interface", adn add a child ColorRect:
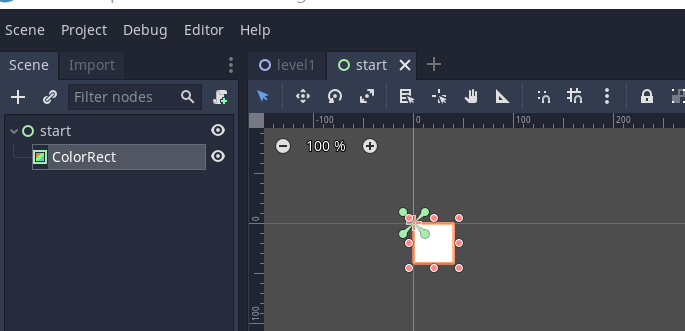
For the ColorRect, change the color (to whatever you want) and size to your window size (1024x600 in our case):
Here's what mine looks like:
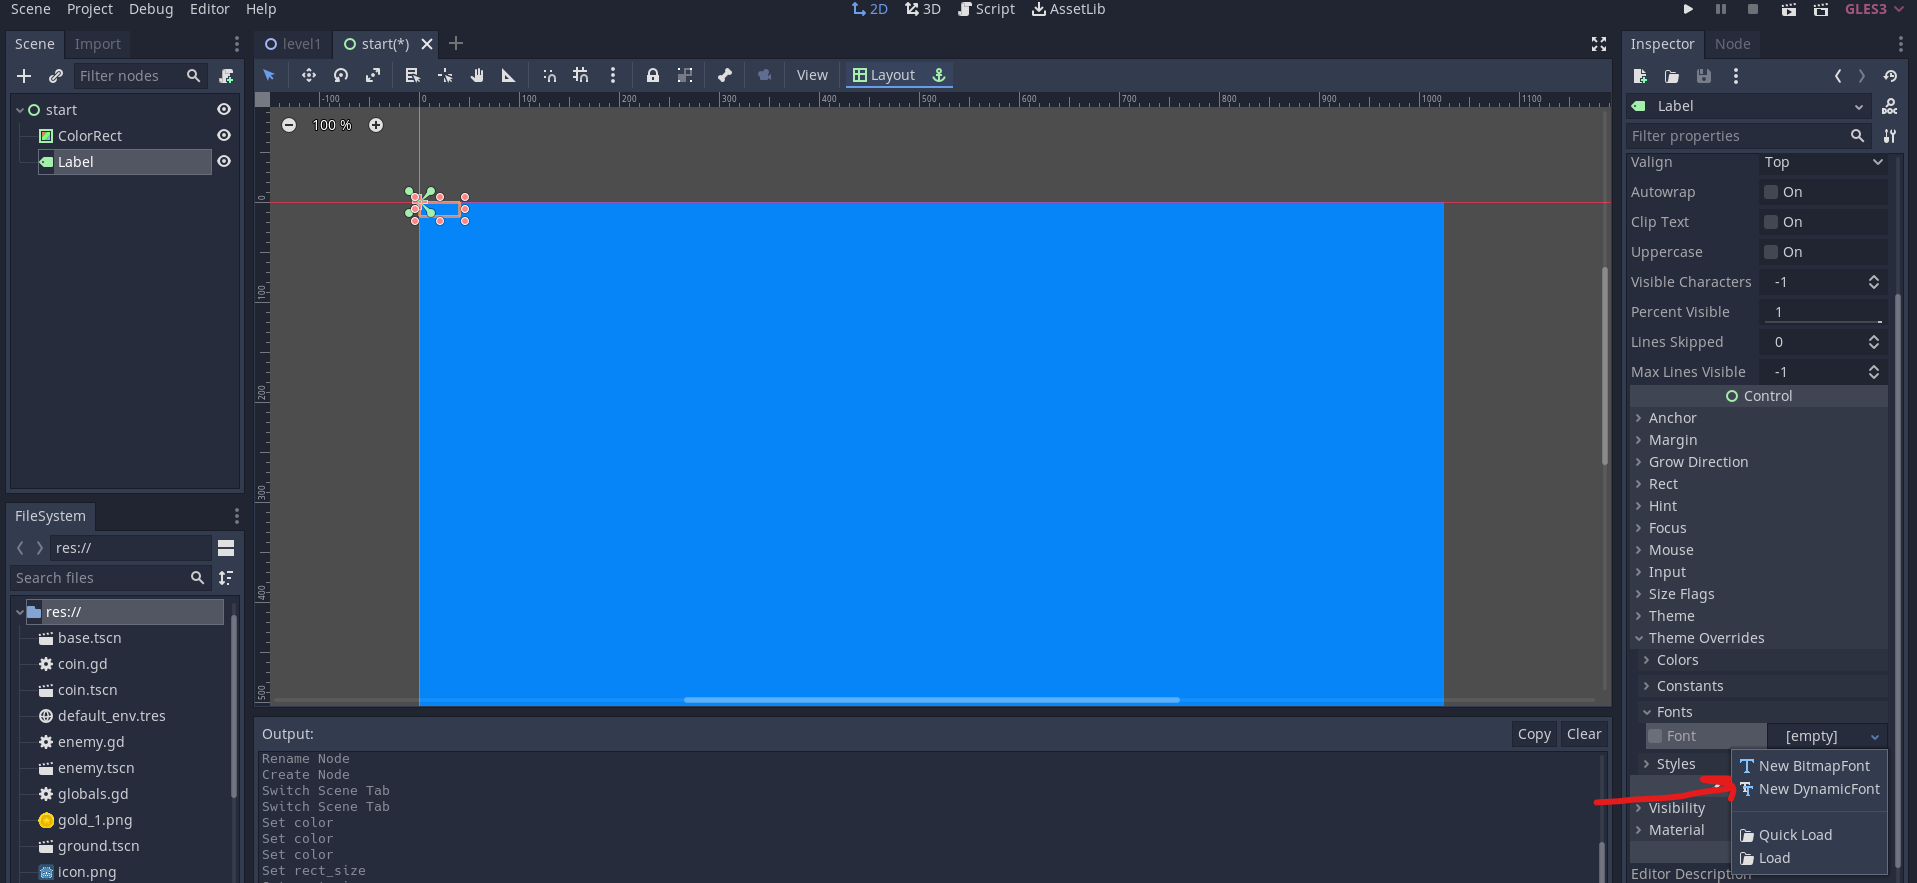
Add a new Label as a child to the top start node.
In the Inspector, go to Theme overrides, choose Fonts, and add a new Dynamic font:
Click on the new font you created:

For this project, Im using IndieFlower font by Google. Drag the ttf file to Font data.
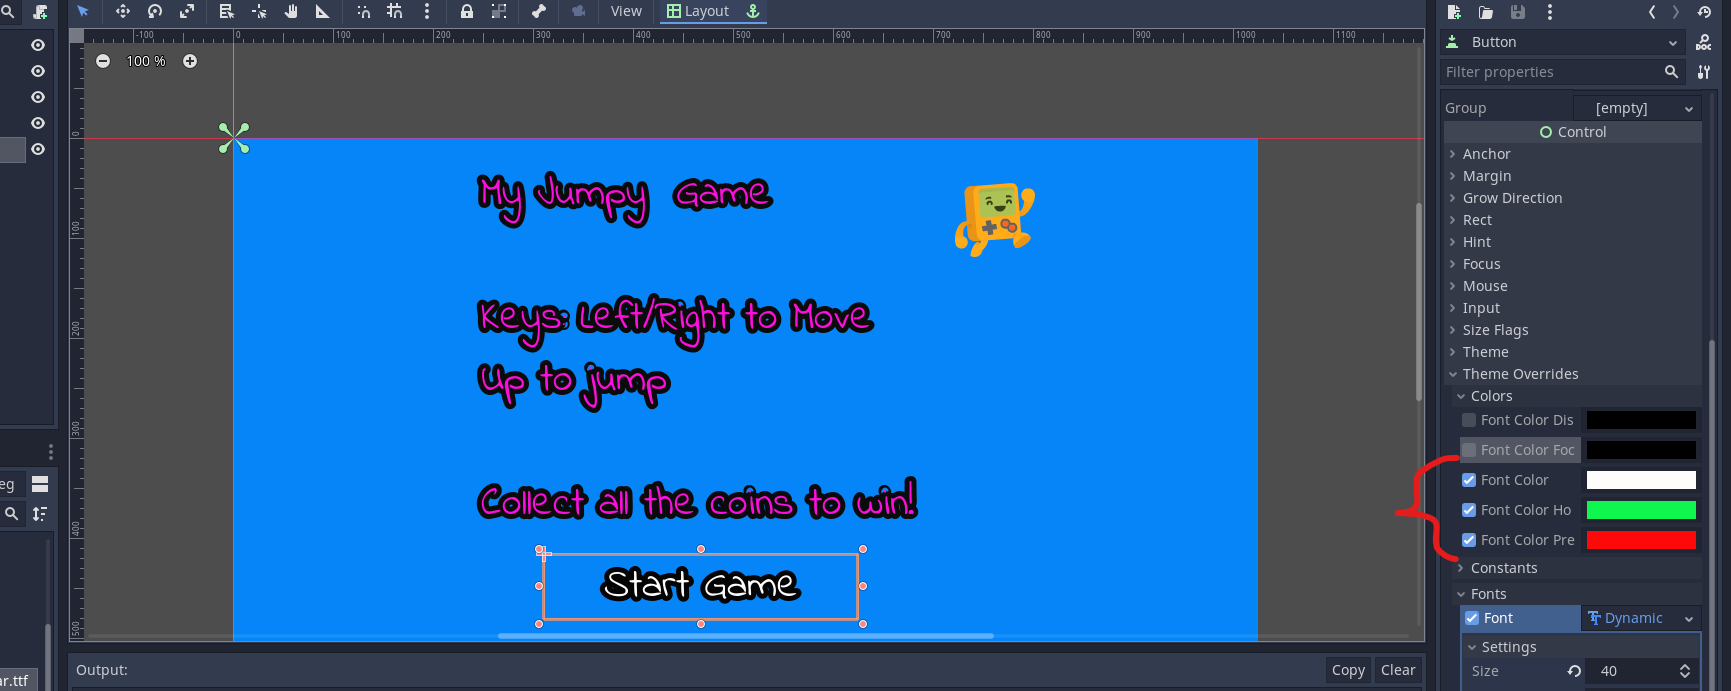
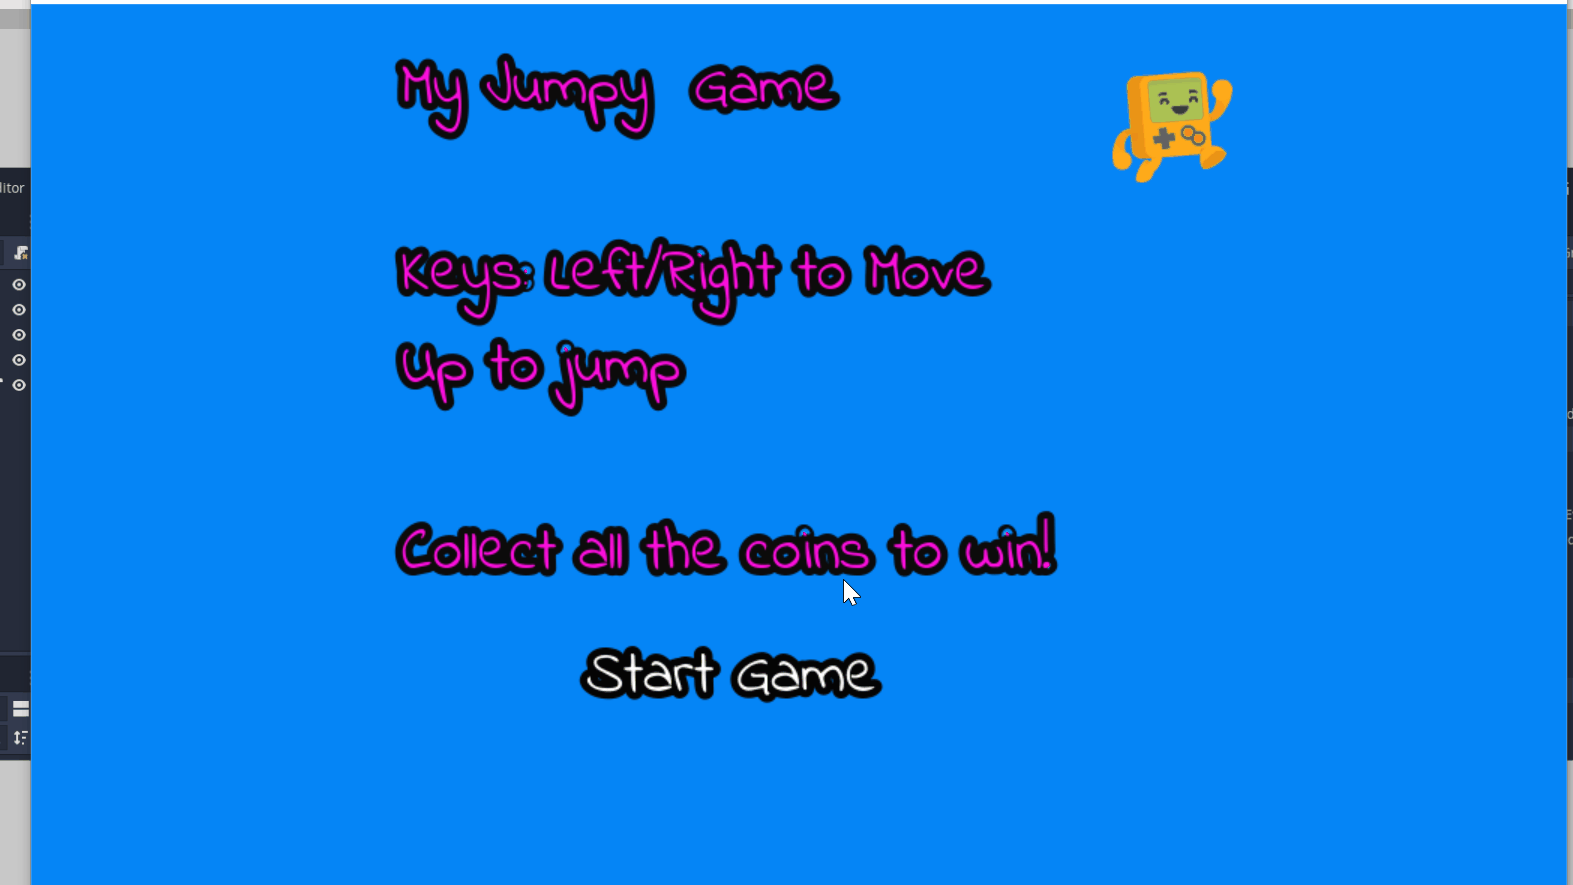
In the text section of the Label, add:
My Jumpy  Game

Keys: Left/Right to Move
Up to jump

Collect all the coins to win!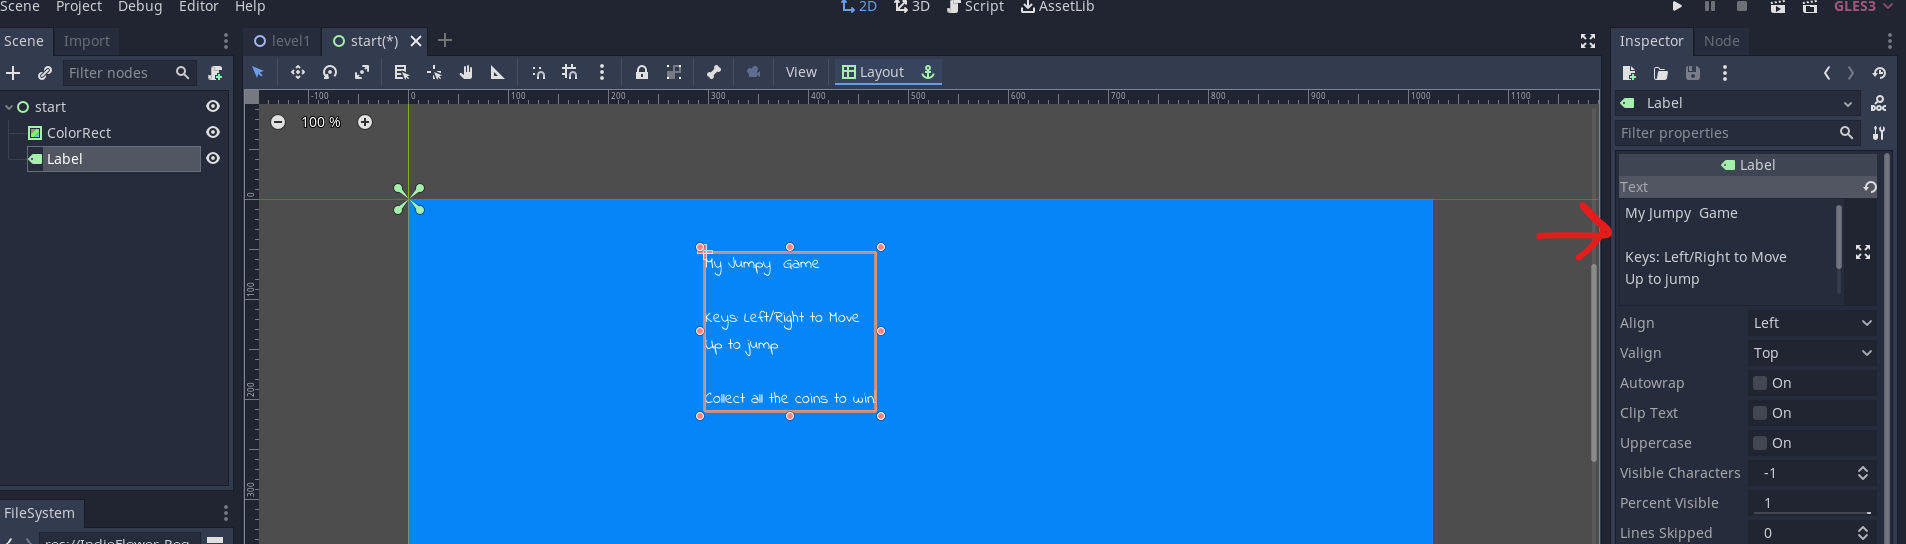
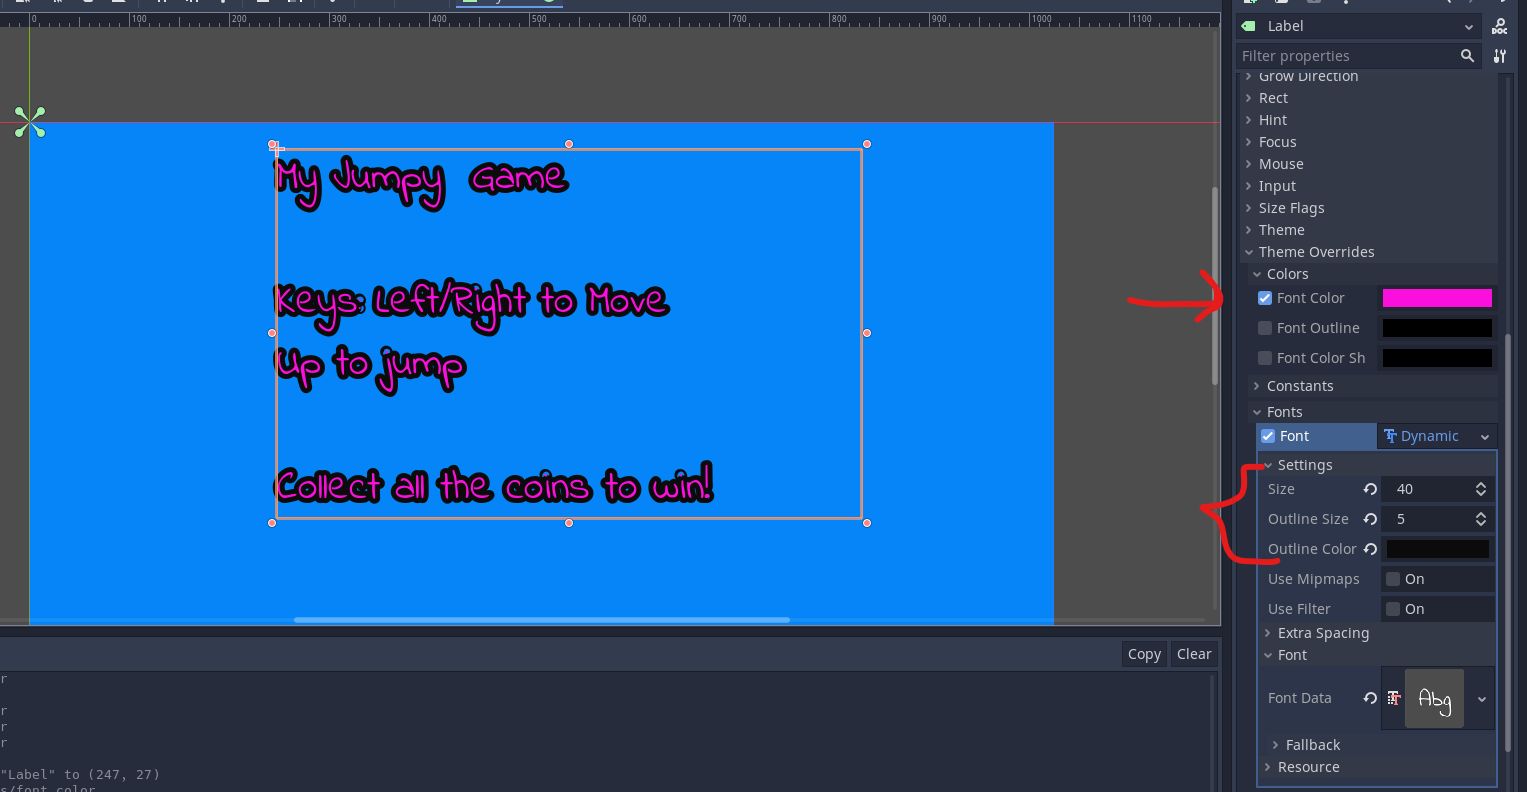
The text isn't clear. Luckily, since we are using our own font, we can change the size / clarity etc.
Go back to the Font settings, where we created the font, and change the size. I also changed the color and outline:
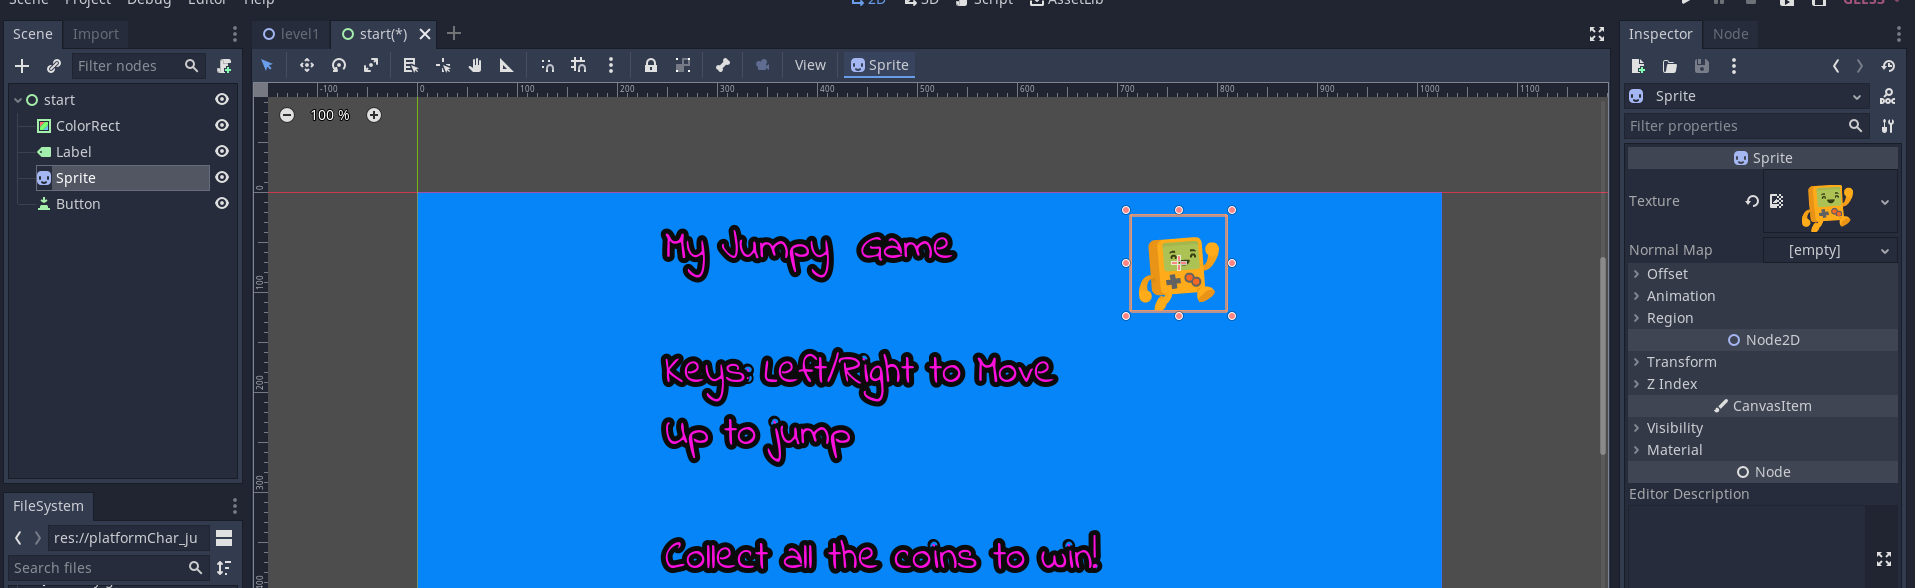
Also add a Sprite and a button to the UI. For the sprite, I used our player:
For the button, add a Font as before, and add the text "Start Game". also click on "Flat button":
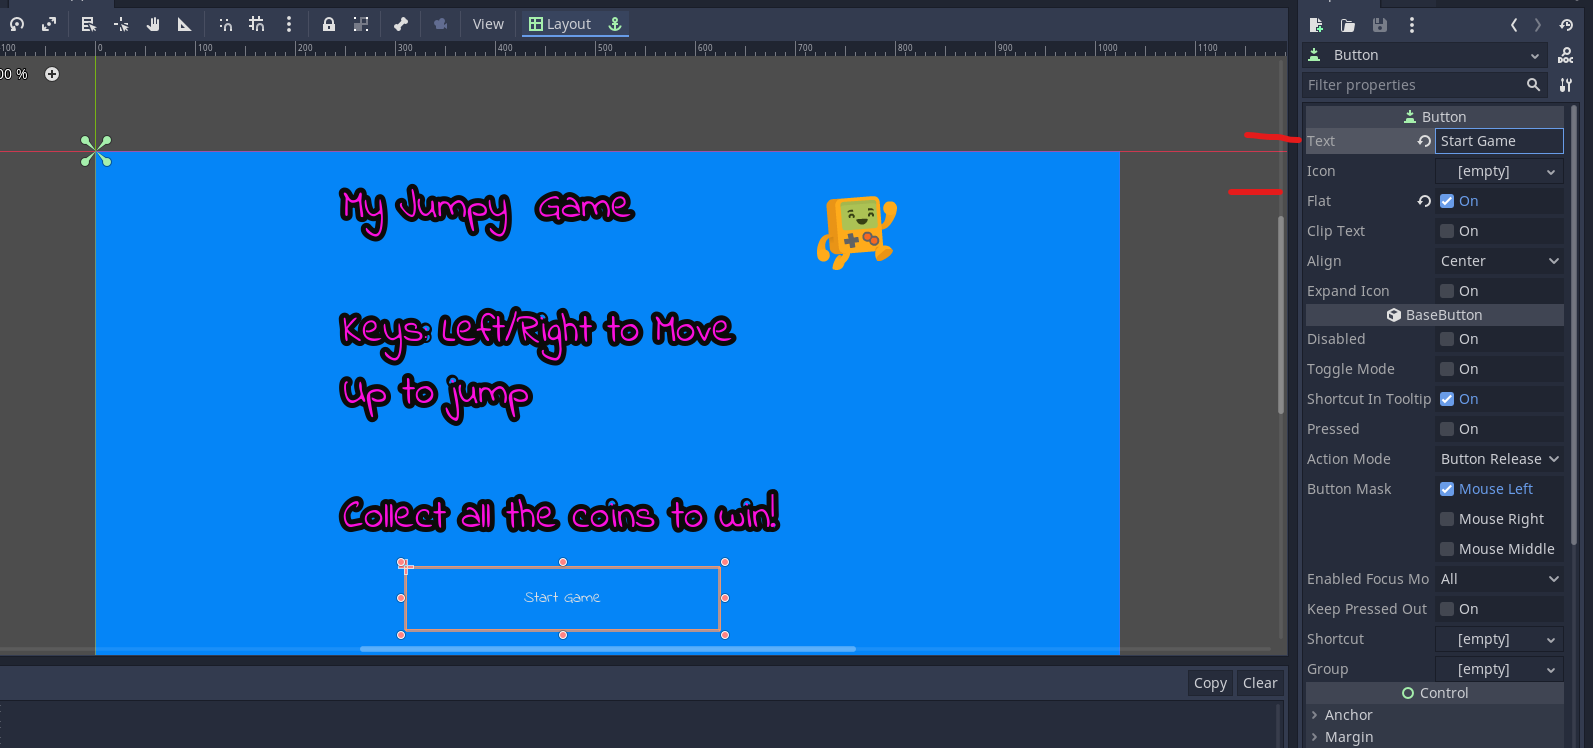
Increase the font size as before.
I also set the pressed and hover colors:
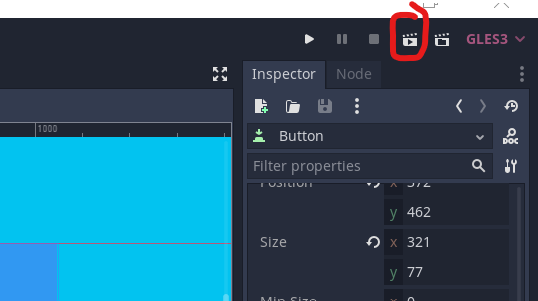
This will ensure I will see a green color when I hover on the button, and red when I press it. Try it by playing just the scene:
The button doesn't do anything at the moment. Let's fix that.
Click on the script icon next to button and add a script button.gd.
Now, with the button selected, go to the inspector and a function for what happens when the button is pressed:
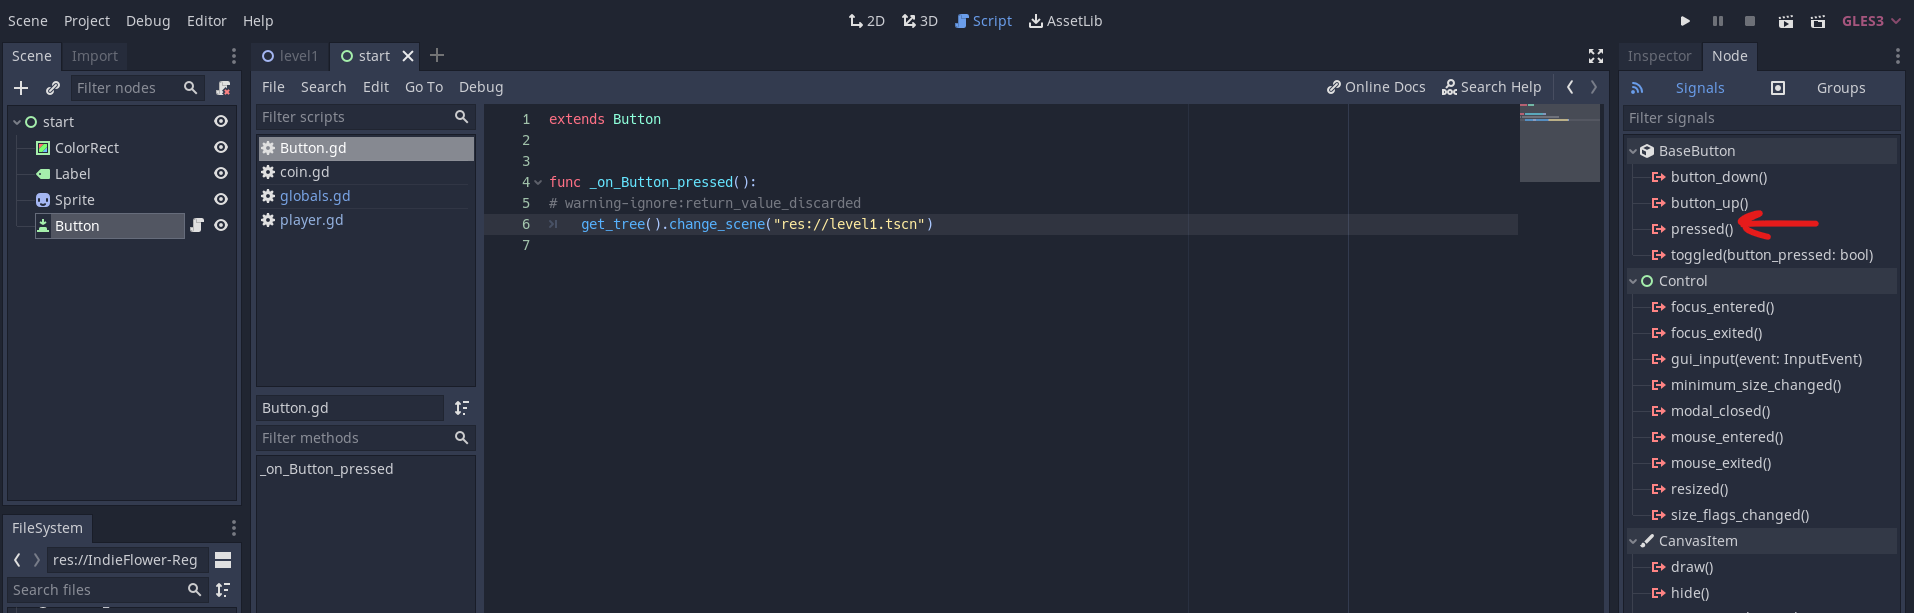
Connect to our new button.gd script, and update it:
extends Button


func _on_Button_pressed():
	get_tree().change_scene("res://level1.tscn")
It just starts the game.
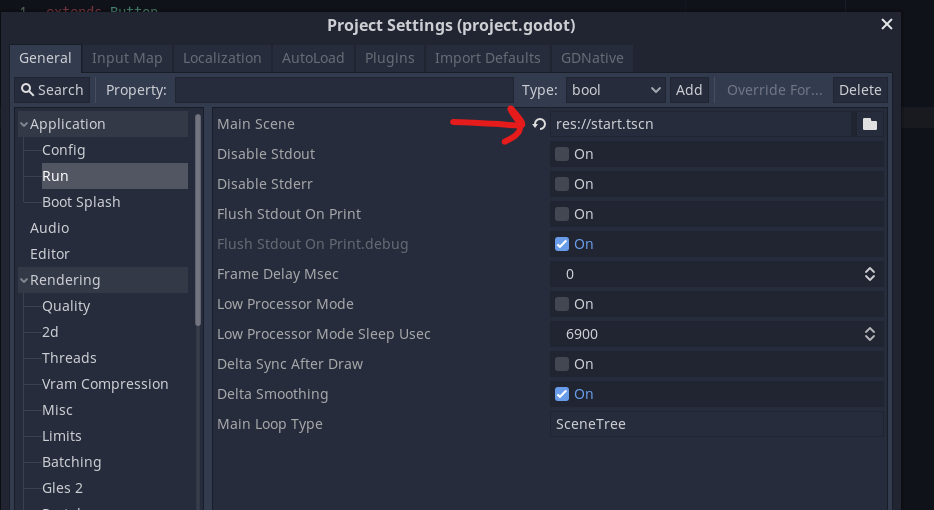
Now, we need to ensure this start screen is shown at the beginning. Go to Project Settings, and change it to our new start scene:
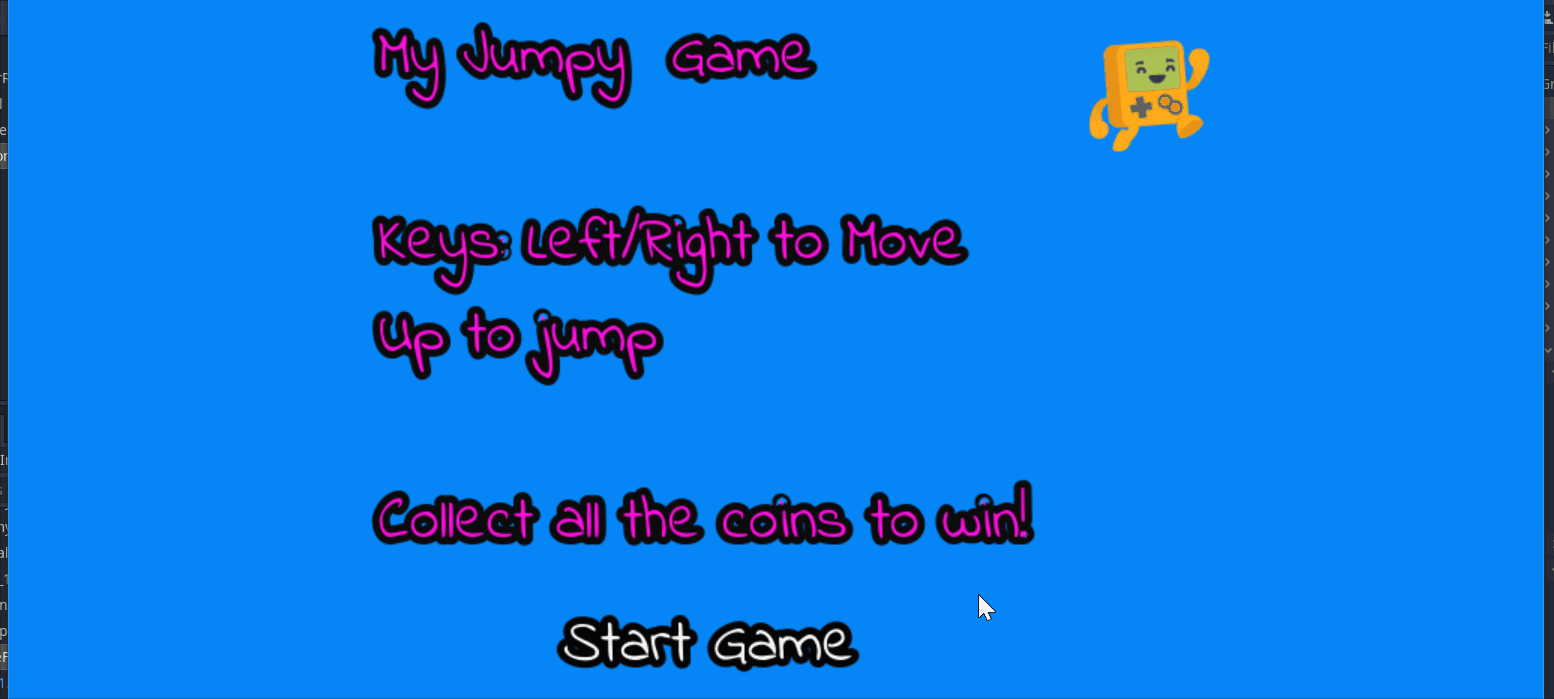
Run the game, and it should work:
Pretty good so far! Just need to do 2 more things. We need to add screens for when the player wins or loses.
Add the Win and lose screens
With the start scene selected, click on scene-> New inherited scene
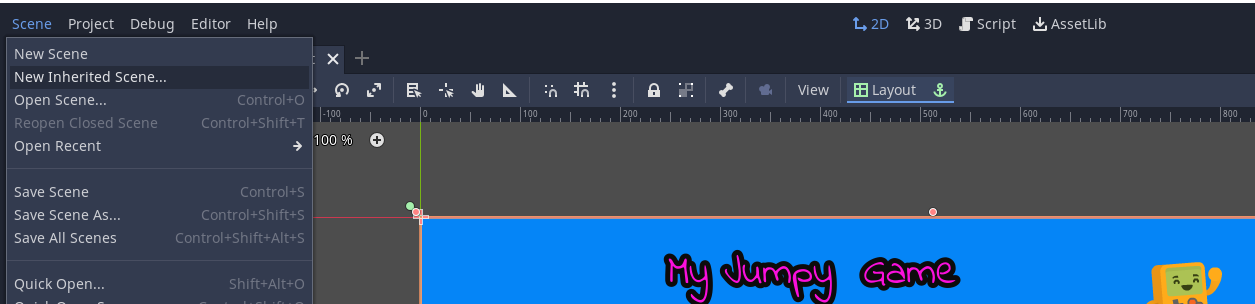
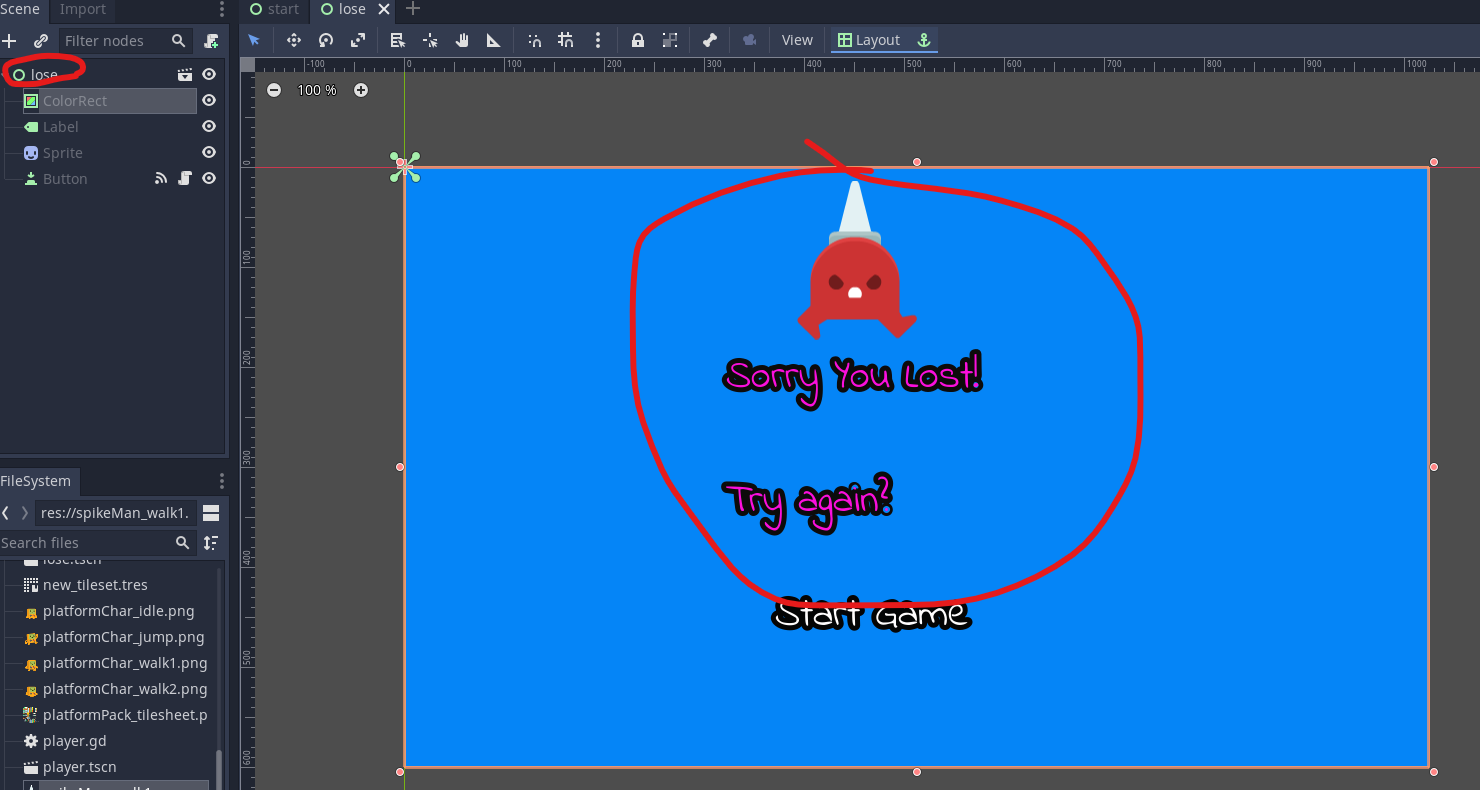
Choose start.tscn, and save the new scene as lose.tscn
I update my scene to change the message :
And create a win scene:
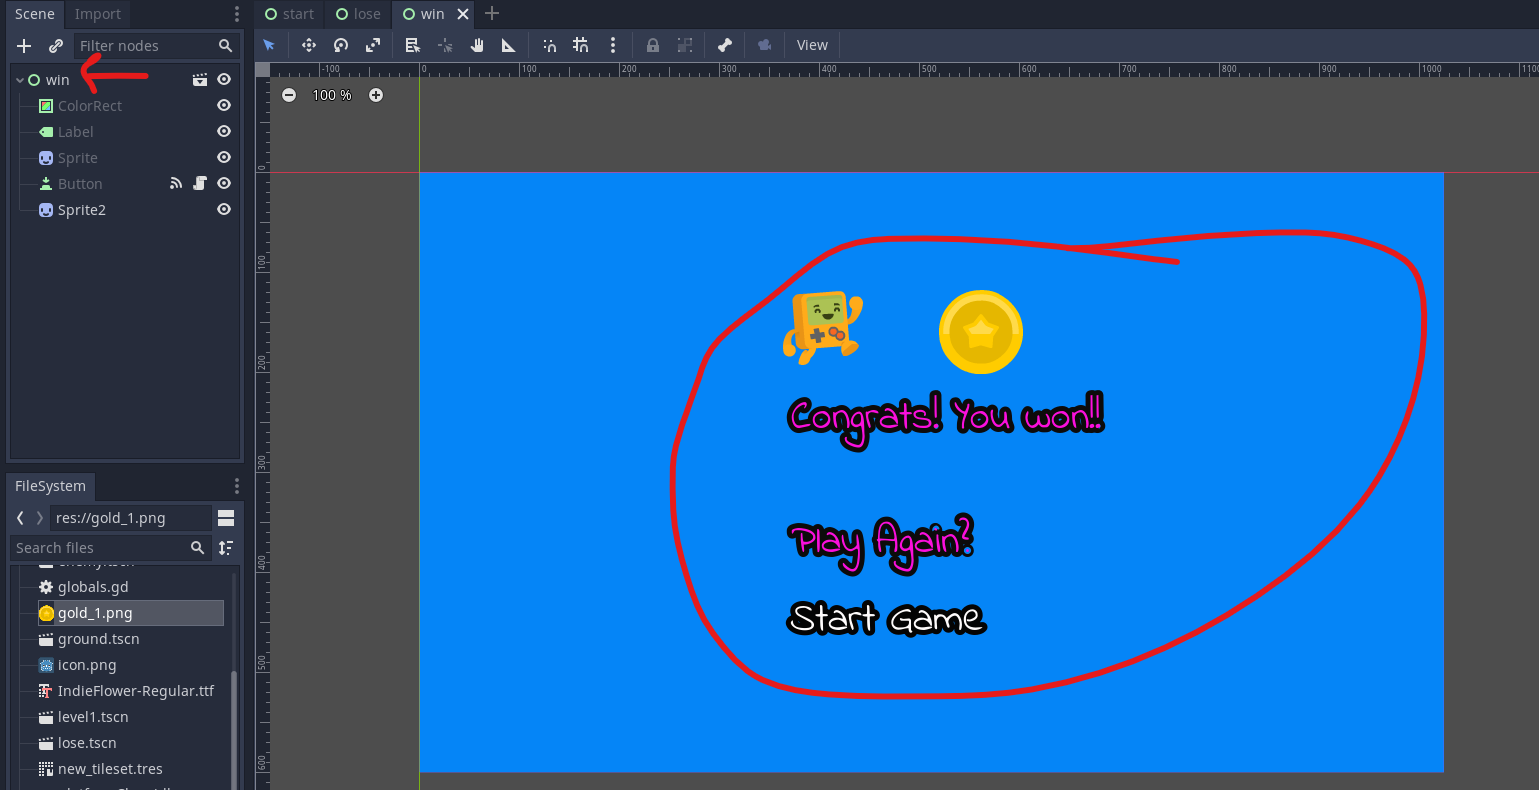
We now need to update the code so it goes to the win/lose screen.
Update the die function:
func die():
	Globals.player_lives -= 1
	if Globals.player_lives > 0:
		# warning-ignore:return_value_discarded
		get_parent().get_node("hud/lives_left").text = str(Globals.player_lives)
		get_tree().change_scene("res://level1.tscn")
	else:
		print("You died!")
		get_tree().change_scene("res://lose.tscn") ==> THIS IS THE NEW LINE
Update on_coins_body_entered:
	if coins_found == TOTAL_COINS:
		print("You win!")
		get_tree().change_scene("res://win.tscn")
And that's it! Try the game now, you should be able to play it.
Export our game to a web project
Click Editor->Manage Export Templates:

If this is the 1st time, you'll have to download the templates by clicking "Download and Install"
Click Projects-> Export and choose HTML5:
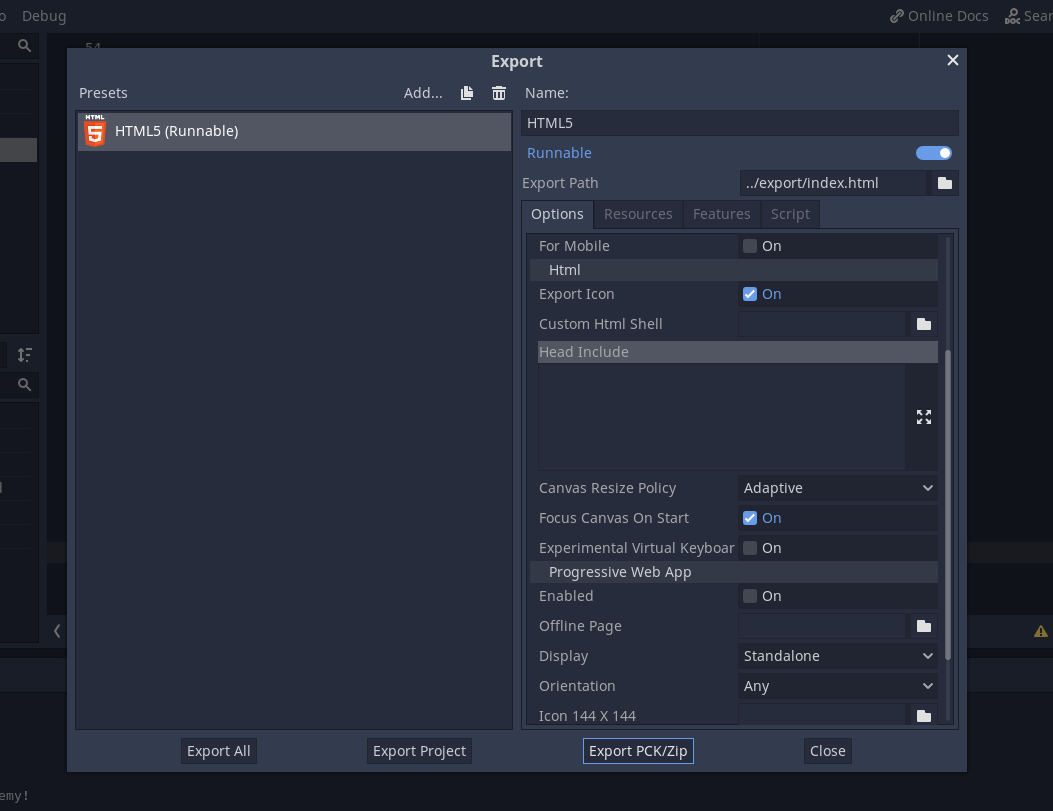
Click export project, and choose an empty folder. It will ask you to create an html file, make sure you name it as index.html
You will have a folder like:
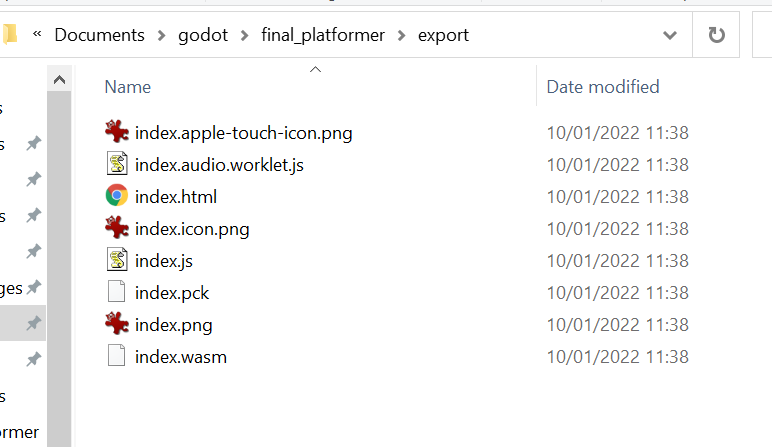
Zip up this folder. You can now upload it to itch.io (or similar) to play it offline.
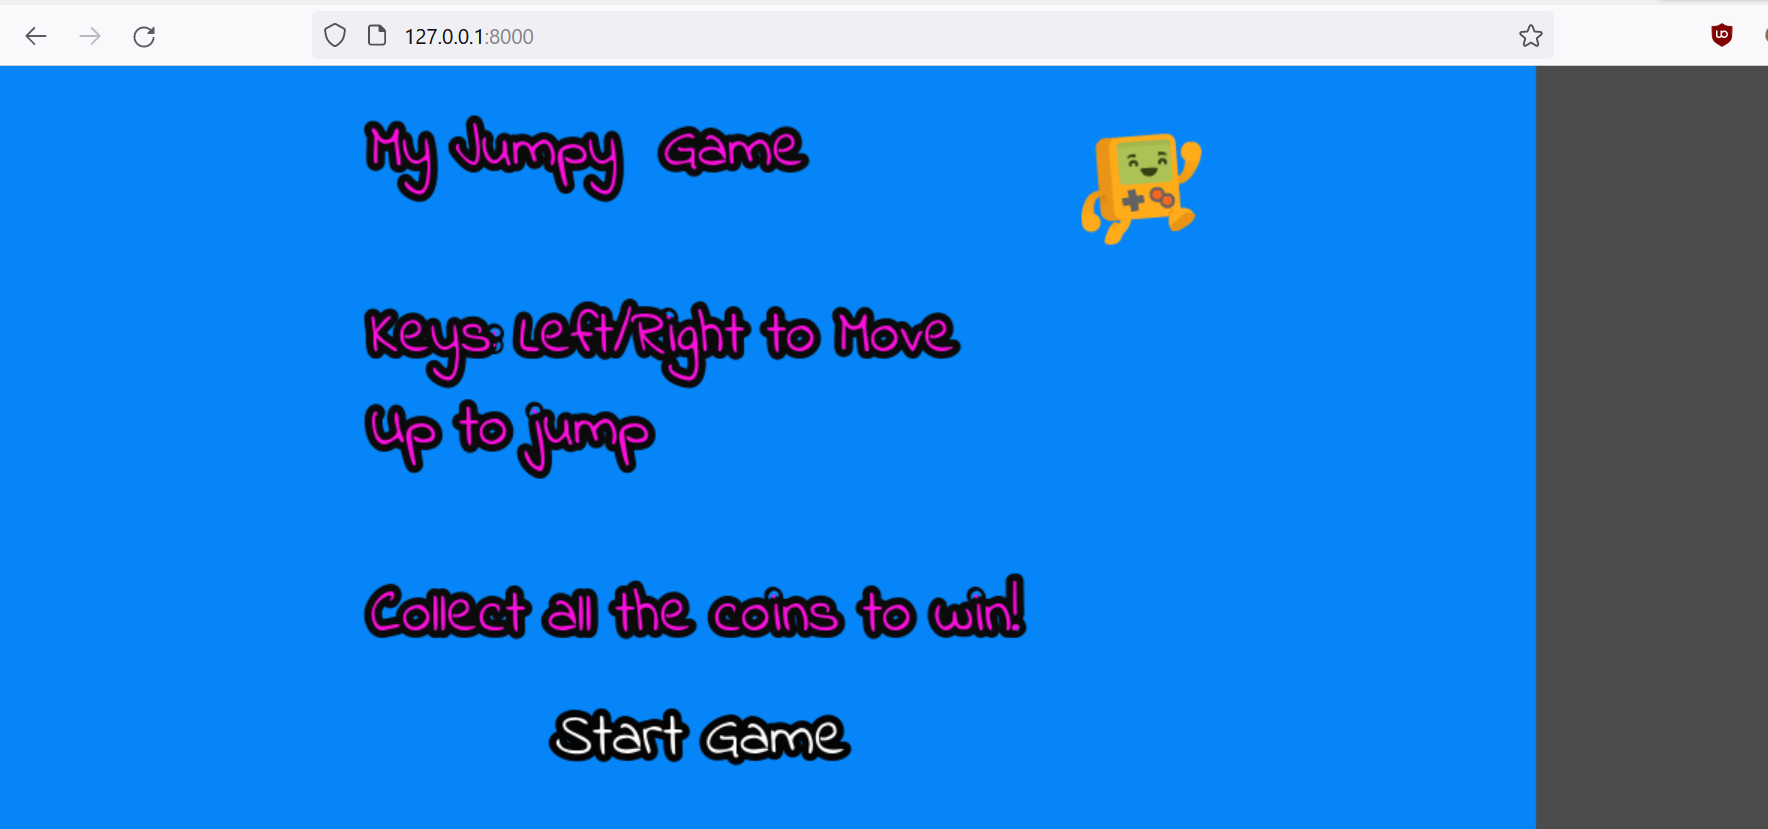
Note, you cannot play on your machine due to security restrictions (at least, not without running a local server. To do so, run this command in the export directory:
python -m http.serverYou can now go to http://127.0.0.1:8000/ to play the game:
And there you go. To play my version, go here: https://shantnutiwari.itch.io/my-first-jumpy-game